
Tips & Tricks
The Video Electronics Standards Association (VESA) is a standardisation organisation based in the USA in which over 250 member companies have joined together to create uniform specifications of video standards.
The VESA standards are the mounting standards that have become internationally accepted for the mounting of modern TVs, monitors and other devices. The universal VESA standard defines the distance between the four mounting holes on the back of the device in millimetres.
Almost all mounts for TV, tablet or monitor available from HAGOR cover the VESA standards to varying degrees. Please refer to the information in our product descriptions and data sheets.
The Video Electronics Standards Association (VESA) has subdivided the VESA standard and published the guide values.
The classifications provide information about the hole pattern, the permitted weight and the intended screen diagonal.
We have listed the 3 most common standards here. Deviations are possible. The VESA MIS-A and VESA MIS-B standards
also exist, but are extremely rare.
VESA MIS-D
for monitors and smaller TVs
12″ – 23″ | 30 – 58 cm screen diagonal
hole pattern:
75 x 75 mm / 100 x 100 mm
max. load: 14 kg
VESA MIS-E
for TVs and larger monitors
23″ – 31″ | 58 – 78 cm screen diagonal
hole pattern:
200 x 100 mm / 200 x 200 mm
max. load: 22.7 kg
VESA MIS-F
for larger TVs
31″ – 90″ | 78 – 229 cm screen diagonal
hole pattern:
400 x 200 mm / 400 x 400 mm /
600 x 200 mm / 600 x 400 mm /
800 x 400 mm
max. load: 113.6 kg

Ideally, you will find the VESA standard on the packaging or in the manual of the device. If this is not the case, you can simply measure the VESA standard with a centimetre ruler on the back of the device.
First measure the horizontal distance of the threaded holes from the centre of the hole to the centre of the hole and then the vertical distance, also from the centre of the hole to the centre of the hole.
Example:
horizontal distance = 200 mm
vertical distance = 100 mm
VESA standard = 200 x 100 mm
The VESA standard is usually given in square form for devices and mounts, e.g. 50 x 50 mm, 75 x 75 mm, 100 x 100 mm, 200 x 200 mm, etc. – However, this does not mean that the standard must necessarily be square, as the example above shows.

If the VESA standards of the mount and the device do not match, adapters can be used in many cases.
VESA adapters are available in different designs, as adapter plates or adapter stripes.
These are mounted between the device and the mount and simply compensate for differences in the VESA standards.
When using an adapter, please always pay attention to the maximum load indicated. This may differ from the maximum load of the mount.
View adaptersSome product series do not have a VESA standard. This can have various reasons.
There are several ways to mount such a device anyway. You can use a corresponding adapter that makes the device VESA compatible or you can use a display specific mount.
First you have to decide how the device should be mounted. Should it be a wall mount, a floor stand or a ceiling mount?
Screens can be mounted directly on the wall with an appropriate wall mount. Wall mounts are also available in different versions – fixed, tiltable, swivelling, fully movable – depending on the place of use and requirements, you can make your choice here.
Floor stands also offer different options – mobile, fixed, floor/wall mounting – here, too, the requirements, location and of course the desired design determine the choice.
Ceiling mounts are also a possibility and here too there are various options to consider. Should the screen be folded away when not in use? Or does it need to be mountable on a sloping ceiling. No problem with the right mount.
The following information is needed to select the right wall mount.
-
- How large is the screen?
- Which VESA hole pattern is available?
- What is the weight of the screen?
- Is the load capacity of the wall sufficient?
- How moveable does the mount need to be?
If you can answer these questions, you are almost there.
You can choose from different variants of wall mounts or use our practical mount finder.
This is how every TV holds properly on the wall!
Will my TV really hold on my wall and which special anchors do I need to ensure a secure hold?
That is the question of all questions when I want to mount my TV on the wall. After all, nothing would be worse than seeing your brand-new TV fall off the wall.
For this reason, we have listed the most important information here.
Probably the best-known anchor, which is found in every household, is the expansion anchor. These are usually included in the scope of delivery of every wall mount. Due to today’s lightweight construction, however, they are only needed in the rarest of cases.
For this reason, the expansion anchor has been replaced in most cases by the all-purpose anchor. Due to their variety of shapes, they are suitable for all those installations where no particularly heavy loads have to be mounted.
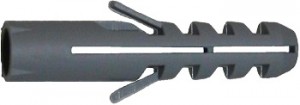
Expansion anchor
suitable for:
- Concrete walls
- Solid brickwork

Expansion anchor
suitable for:
- Concrete walls
- Solid brickwork
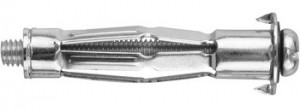
Metal hollow cavity anchor
suitable for:
- Wallboard
- Plasterboard
- Gypsum fibre boards
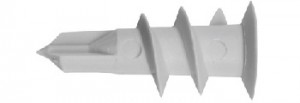
Plaster cardboard dowel
suitable for:
- Wallboard
- Plasterboard
- Gypsum fibre boards
Make anchor holes with the right tool!
The right choice of tool is immensely important for different substrates! If you are not careful, the holes will tear open and you have to close them again and lose valuable time.
Always drill at a right angle and never change direction. This is especially important with soft building materials!
Always use a masonry drill – drills for metal or wood are unsuitable. A masonry drill is usually made of hard metal and has a wedge-shaped tip that resembles the head of a hammerhead shark.
Basically, the following applies: dowel diameter = drill hole diameter (1 mm smaller for soft building materials).
Rotating drilling
for substrates such as:
- Aerated concrete
- Hollow masonry
- Wall panels
- Perforated bricks
Impact drilling
for substrates such as:
- Solid brick
- Solid lime sand brick
- …
Hammer drilling
for substrates such as:
- Concrete
- natural stone
- …
When furnishing a new living room, the choice of the right wall is of course very important, whereby this is usually predefined by connections such as SAT or cable or electricity connections.
In principle, however, you should not choose the wall opposite to a window in order to avoid reflections. If this is only possible by laying cables through the living room, you can still create an appropriate ambience with the help of high-quality cable management solutions.
A “no-go” is the positioning next to the window. Due to the different light influences, the eye has difficulties adjusting, so that it can be disturbing or, in the worst case, lead to headaches!
Opinions on this subject differ time and again. On the one hand, everyone has their own personal feeling, and on the other hand, of course, it also depends on the preferred sitting or viewing position.
The opinion that is mostly spread on the internet that the lower edge of the TV should be slightly above eye level has proven to be correct in most cases!
In most cases, this measurement is around 90 – 100 cm.
However, the greater the distance between the seat and the screen, the higher it can be mounted without giving you a stiff neck during watching!
Our tip:
If you are unsure, cut out a piece of cardboard the size of your screen and hold or stick it in different positions. This way you can easily test which position is right for you!
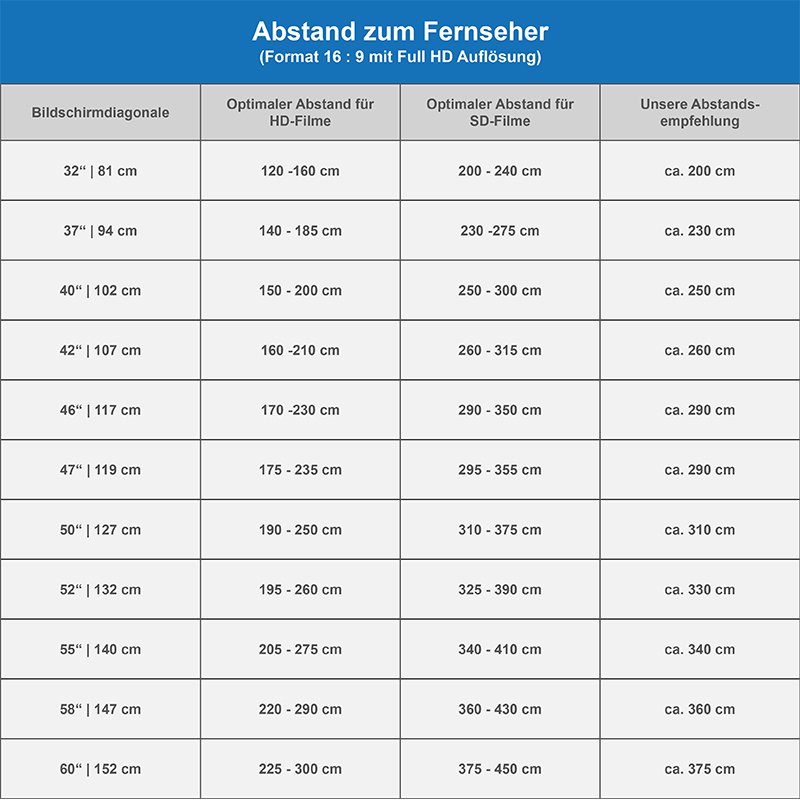
The correct distance to the TV is extremely important for optimal picture quality.
The basic rule is:
Distance between viewer and set in metres : 3 = optimum screen diagonal.
At a distance of approx. 3 m, the screen diagonal should therefore be approx. 1 m / 40″.
However, due to the ever higher resolution offered by screens, this rule often no longer fully applies.
HD, UHD and 4K screens offer such a high pixel density that the distance can also be chosen smaller.
This table is intended as a guide to the correct distance between the user and the TV set. A large screen is not always the right choice, especially in small living rooms.
Click to enlarge
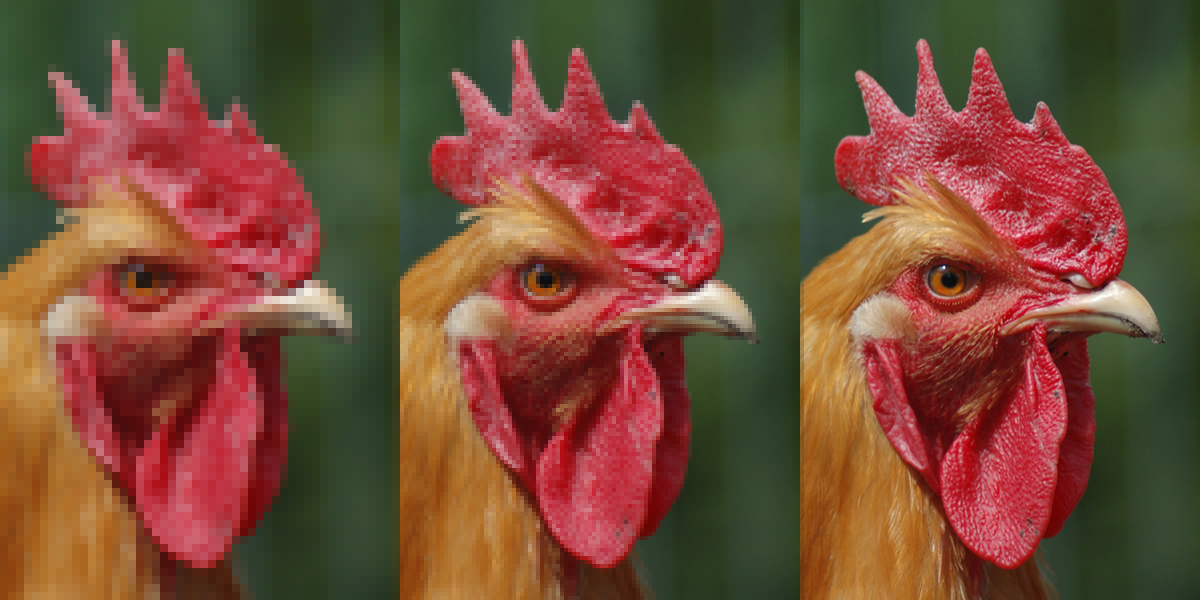
Basically, the “resolution” of a modern TV can be compared to a mosaic – the more numerous and smaller the tiles are, the finer the overall impression.
The higher the resolution of the TV, the sharper and clearer the TV picture appears. So far so clear, but what do all the shortcuts mean?
Many of these shortcuts and technical terms describe the same technology, but each manufacturer uses its own term. We have summarised the most important key data here.
SD
Standard Definition
- 720 x 576 px
- 16 : 9
- TV signal (no HD)
- DVD
HD
High Definition
- 1280 x 720 px
- 16 : 9
- TV signal in HD
- Blu-Rays
UHD | 4K
Ultra High Definition
- 3840 x 2160 px
- 16 : 9
- up to 120 fps (frames / second)
- Ultra HD Blu-Rays
UHD 2 | 8K
Ultra High Definition 2
- 7680 x 4320 px
- 16 : 9
- up to 120 fps (frames / second)
For the purpose of completeness, 5K (5120 x 2880 px) and DCI (4096 x 2160 px) should also be mentioned here.